
It’s that time of year friends, where the weather starts to warm up and the rains subside and we all start dusting off that camping gear and making plans for the summer and fall on the California coast. And one of our favorite places to camp is Tomales Bay in the Point Reyes National Seashore. This region is a real gem, both in terms of its natural elements and its ease of access to folks in the Bay Area. Located 40 miles north of the Golden Gate, Point Reyes has ample hiking trails, beaches, wildlife and campsites. While you can’t drive to any of the campsites, there are backpacking and boat – in sites throughout the park. The camping beaches of Tomales Bay are Boat – In only, meaning you must arrive by kayak, sup, or motorboat to camp here. While Marshall and Tomales Beaches have park service roads (for maintaining bathrooms and trash receptacles and in case of emergencies), access to the camping beaches along Tomales Bay’s west shore is via the water only. Permits are required, released 3 months in advance and can be secured at recreation.gov.
There are several launching locations around Tomales Bay to choose from and different sites are better suited for different groups or activities. To avoid crossing the bay (which can have strong wind and current), a launch from Chicken Ranch is recommended – this is a good idea for groups with youth or dogs. It’s about 5 miles from Chicken Ranch to Marshall Beach. Heart’s Desire Beach is the closest launching point to the campsites for folks going on a rental or guided tour with Blue Waters Kayaking – it’s about 3 miles along the shoreline from Heart’s to Marshall. This is great for kids and groups, but unfortunately, dogs are not allowed.
Miller Boat Launch is further north and on the east shore of Tomales Bay, meaning you’ll have a 1 mile open water crossing to reach the camping beaches plus some time and mileage paddling north or south to your desired location. Dogs are permitted here, but they are not allowed north of the elk fence, which are the beaches directly across the bay from this launch location. You could still launch from here with dogs but would need to head south to Tomales or Marshall beach to camp with your canines.
Note that some of the smaller camping beaches will “disappear” at high tides. There’s nothing worse than waking up to waves lapping at your feet in the middle of the night. Check the local tide log or use the links below to decide which beach will be best for your group.
Tide Resources:
Wildlife is abundant in any section of Tomales Bay. Meandering along the shoreline gives you the best opportunity for observing bat rays or leopard sharks in the shallows, as well as the avian community among the trees. Deeper water, found on the crossings may host seals and sea lions, plus rafts of migrating ducks in the winter.
On moonless nights, just off the shore from all the camping beaches, the glitter and sparkle of bioluminescence can be viewed from your kayak. (Be sure to have a red light on your kayak so you are visible to other boaters but won’t ruin your night vision)
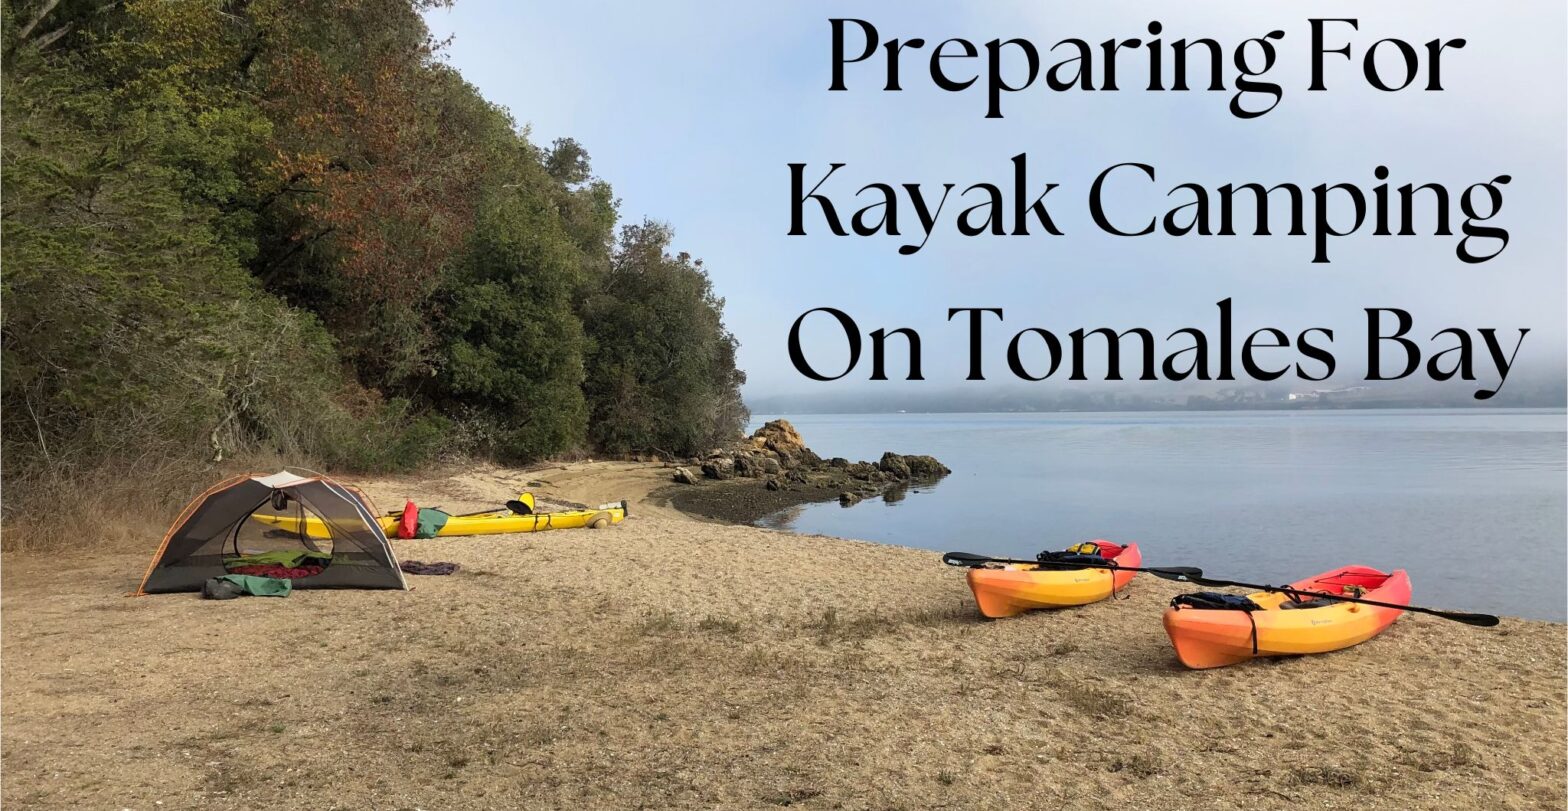
While mornings can be damp anytime of year on the coast, the camping beaches of Tomales Bay are blessed with morning sunshine, to warm you up and dry you off before departing for the day’s adventures.
While this post is mostly intended to be an elaboration on a packing list, it would be remiss if I didn’t mention a few other noteworthy items.
Conditions on Tomales Bay can vary considerably from day to day and even hour to hour. Our primary concern when kayaking in the Point Reyes area is the wind. Wind speeds around 15 miles per hour may be challenging for some folks, which can bring down the fun factor considerably. It could also mean canceling a trip if it’s forecast to blow 15 mph or more. Anything over 20 miles per hour is a definite cancellation from Blue Waters Kayaking. Consider your group and individual experience and comfort levels when deciding whether or not to proceed. It’s ok to take a hike instead!
Weather/ Wind Resources:
Springtime (March through May) is the windy season. Winds are often forecasted in the mid 20’s and higher. Your chance of needing to make alternate plans is highest in the springtime.
We have a longer summer season here, which runs from June-ish through October-ish. During these months, the winds are often calm in the morning, breezy in the afternoons and calm again in the evenings. It’s best to plan your trip to launch in the morning, with plenty of time to make it to camp before the afternoon winds kick up.
Winters are mild along the coast, and in between storms can be excellent camping opportunities. Wildlife is abundant and crowds are few this time of year. Nights are long, so be sure to pack appropriate clothing and firewood or propane fire pit.
There is minimal cell phone reception in the area, just the way we like it. Be sure to put your phone on airplane mode so you can still use it to capture photos, and so it will have enough juice, should you need to use it for an emergency.
Now, onto the (expanded) packing list.
One of my favorite things about kayak camping is how comfortable you can be. There’s no need to skimp on food or clothes or creature comforts – if you pack smart you can have it all! Below is a recommended packing list with some commentary on the type of equipment to bring on a kayak camping trip.
For camping:
- Sleeping pad
- Sleeping bag
- Tent (optional)
- Chair – crazy creek, or burrito
- Headlamp

Tents are great if you’re expecting rain or if mosquitos are present at camp. Neither are the case when camping on Tomales Bay in the summer and fall. Since we have a rainy (winter) season and a dry (summer/fall) season, we typically won’t see rain or even have it forecasted to rain from May-ish through October-ish. However, we can have dense fog out here on the coast and mornings are often dewy. So, either you’re packing your tent away wet, which then needs to be pulled back out at home to dry, or you can forgo the tent all together. While a sleeping bag would eventually become soaked in a rain event, not so much in the dew. Sure, it will be damp but as long as you have a decent, water resistant bag, you won’t be. Without a tent in your kayak, you’ll have room for a bigger (more comfy) sleeping pad, camp chair or other bonus item.
For cooking:
- Stove
- Fuel
- Pots/Pans
- Cooking and Serving utensils
- Personal utensils, bowl and mug
- Potable Water – 1 gallon jugs or dromedary bags work well
- Folding or Roll top table
- Biodegradable soap, sponge

-This is really going to depend on your group. When I’m guiding and just cooking for myself, I bring my tiny stove, iso butane and one pot. I often make churched up ramen (see recipe below) or any other one pot meal. These small camp stoves are great for boiling water (or making soup) but not that great for actually cooking.
-If you’re making more elaborate meals a 2 burner stove is nice. These can be secured under the bungees of your kayak, but you’ll want to have it in something waterproof or resistant to keep it from getting rusty. I have a Coleman 2 burner that folds in half, which fits in the hatches of the closed deck kayaks.
-The dark green fuel canisters commonly used for the 2 burner stoves are not refillable BUT there is a bright green canister that IS! These can be refilled from a 30 lb tank (commonly used for home bbq’s) via a special connector.
-Until recently the fuel canisters for the smaller stoves (iso-butane), were not refillable and I would carry 3 previously opened canisters with me all summer trying to run out the last bit of fuel from each of them. Now there is a small device that lets you transfer fuel from one canister to another.
-Cookware – again this is going to depend on what meals you plan to make. On my solo trips, that means one pot and chopsticks.
-For a 2 burner set up with more elaborate meals, you’ll want to make sure you have what you need without bringing excessive amounts of gear. One big pot and a wok or skillet should do the trick, plus a spatula and big spoon. It’s nice to bring the little stoves along to quickly make hot water for tea or coffee, while the bigger stoves are in use.
-For personal utensils, chopsticks work for all meals. Sporks are also a nice option.
-I often eat straight out of my small pot when just cooking for myself. It has a lid, so I can keep leftovers and I can use this as my bowl for group meals too. A small tupperware also makes a nice “bowl” that can be secured for travel. On multi day trips we often pack our lunch just after breakfast, so having a multi purpose travel bowl is great!

-All the snacks all the time – trail mix, crackers, meat sticks, dried fruit, string cheese
-One pot meals or build your own like ramen, nachos, baked potatoes, shish kebabs are interactive and have minimal clean up.
-Because it isn’t that warm on Tomales Bay (most days), you can get away with bringing fresh food and no cooler. This is especially true if you avoid meat. Fruit is generally durable and travels well. A note on bananas – never put them in a dry bag, they ripen really quickly in there and have a high smash potential.
-Opt for hardier greens like kale over lettuce (although romaine holds up pretty good for the first day)
-Bring the vegetables whole, and chop them at camp
-Bags of frozen veggies work well; they’ll be thawed by the time you need them and they can be used like ice packs to help keep other items chilled.
-Hard cheeses (like parmesan) or soft cheeses (like the squeezable goat cheeses) hold up best, whereas cheddar and the like tend to get sweaty and weird.
-Meat sticks and tinned fish also travel well.
-Bread can get smashed, so opt for tortillas or other flat breads
-Chocolate melts and can get smeared on other things in the same bag. Brownies are a nice alternative.

- 1 package ramen noodles – your choice – you can go 25 cent Maruchan ramen or something fancy from the health food store, or something authentic from your local Asian market
- Vegetables – whatever is in the fridge – my favorites for this recipe are kale and mushrooms, carrots are great too.
- 1 Egg
- Soy Sauce, Tamari or Dr. Bragg’s Aminos
- Hot Chili Oil or Gochujang
-Sauté vegetables and set aside
-Add water and bring to a boil
-Once boiling add the noodles and spice packet
-Crack egg into soup
-Stir continuously to poach the egg
-Once noodles and egg are cooked (3-5 minutes) top with veggies, soy sauce and chili oil to taste.

There is no potable water at any of the campsites on Tomales Bay, nor are there any creeks to filter from. To reduce the amount of water you’ll need to bring with you, you can use the bay water for your dishes. Water boiled for 5 minutes is sanitized. Dr. Bronner’s is my favorite camp soap because you can also use it to wash your hands, body, hair, brush your teeth – it really is magic soap! Plus you get the bonus of reading material, should you forget your book in the car. Dirty dish water should be strained and scattered below the high tide line.
(the bulk of my packing)
Temperatures in the summertime on Tomales Bay range from the low 50’s at night to the mid 70’s during the day. It is often breezy in the afternoons, making it feel cooler.

- ANYTHING BUT COTTON.
- Hat, sunglasses, sunscreen
- Shorts or quick drying hiking pants
- Work-out tank or t-shirt
- Long sleeve wool or fleece for chilly days
- Shoes you don’t mind getting wet or muddy – Chacos or Tevas, wetsuit booties (with a thick sole), rain boots or wellies, old sneakers
Blue Waters Kayaking provides guests with splash jackets and spray skirts on guided tours. For rentals you can request a wetsuit and splash jacket for no additional fee.

- Swimsuit for nice days!
- Base layers in wool, silk, polypro or fleece
- Warm jacket – like a puffy
- Warm hat
- Wool socks
- Camp shoes – slippers, fuzzy boots
All right, now that you have all your gear staged, let’s pack the kayaks! 
The NRS Bill’s Bag or similarly large dry bag will fit a couple’s gear. Alternatively, you can line a large duffle with a heavy duty trash bag. Attach behind the front seat, trying to give the back person enough space for their feet and paddle stroke. Under the front and back bungees is a good place for firewood, water, last minute add-ons. For a sit on top single the back bungee section is typically wide and flat and can accommodate a small cooler.
Remember: “rig to flip” – in case of a capsize, you’ll want to make sure all items stay on your kayak and don’t sink to the bottom or float away.

It’s like playing Tetris with water proof bags. Never assume that the hatches of your kayak will stay dry. Even on a new boat, water can get in with rough seas or in the event of a capsize. That being said, not everything needs to stay dry. Prioritize your sleeping bag and warm clothes; pretty much everything else can get a little wet and will have time to dry out at camp before you use it.
Stuff sacks lined with a heavy duty trash bag is my preferred system for keeping the essentials dry. The trash bags last years, even with lots of use. They keep your gear nice and dry, while the stuff sack protects the trash bag from rips and tears. My sleeping bag is in its own stuff sack with a pair of sacred socks. These socks never leave the sleeping bag! This way you always have an extra dry warm pair if you need them.
Another stuff sack/trash bag combo is for my clothes. There can be a wide range in temperature on your camping trip, so layers is the name of the game. This stuff sack becomes my pillow. You can even buy stuff sacks that have a fleece or soft lining, so when you turn them inside out you have a soft surface to rest your head on.
I have a heavy duty dry bag that I keep my first aid kit in. This dry bag is kept somewhere that it is accessible while kayaking – typically behind the seat back or in the day hatch. This also serves as my day bag with my phone, keys, lunch, snacks, extra layer and any other essentials.
You’ll want to load the heavier items first, things like food, fuel and water, and try to have them closer to the center of the kayak. In the narrow space of the bow and stern you can load things like the chair, shoes, small bags or sleeping pad.
Under the deck bungees you can secure your water for the day, maps and safety equipment (such as bilge pump and VHF).

Whether a sit on top or closed deck kayak, 1 night or 1 week, camping on Tomales Bay is a fun and rewarding activity that Blue Waters Kayaking has facilitated for many groups over the last 35 years. There are lots of details to consider and we are always happy to help you plan your next trip to Tomales Bay. Stop by our office in Point Reyes Station or give us a call. We’re here 7 days a week.